Open top menu
Showing posts with label recipe. Show all posts
Friday, January 24, 2014
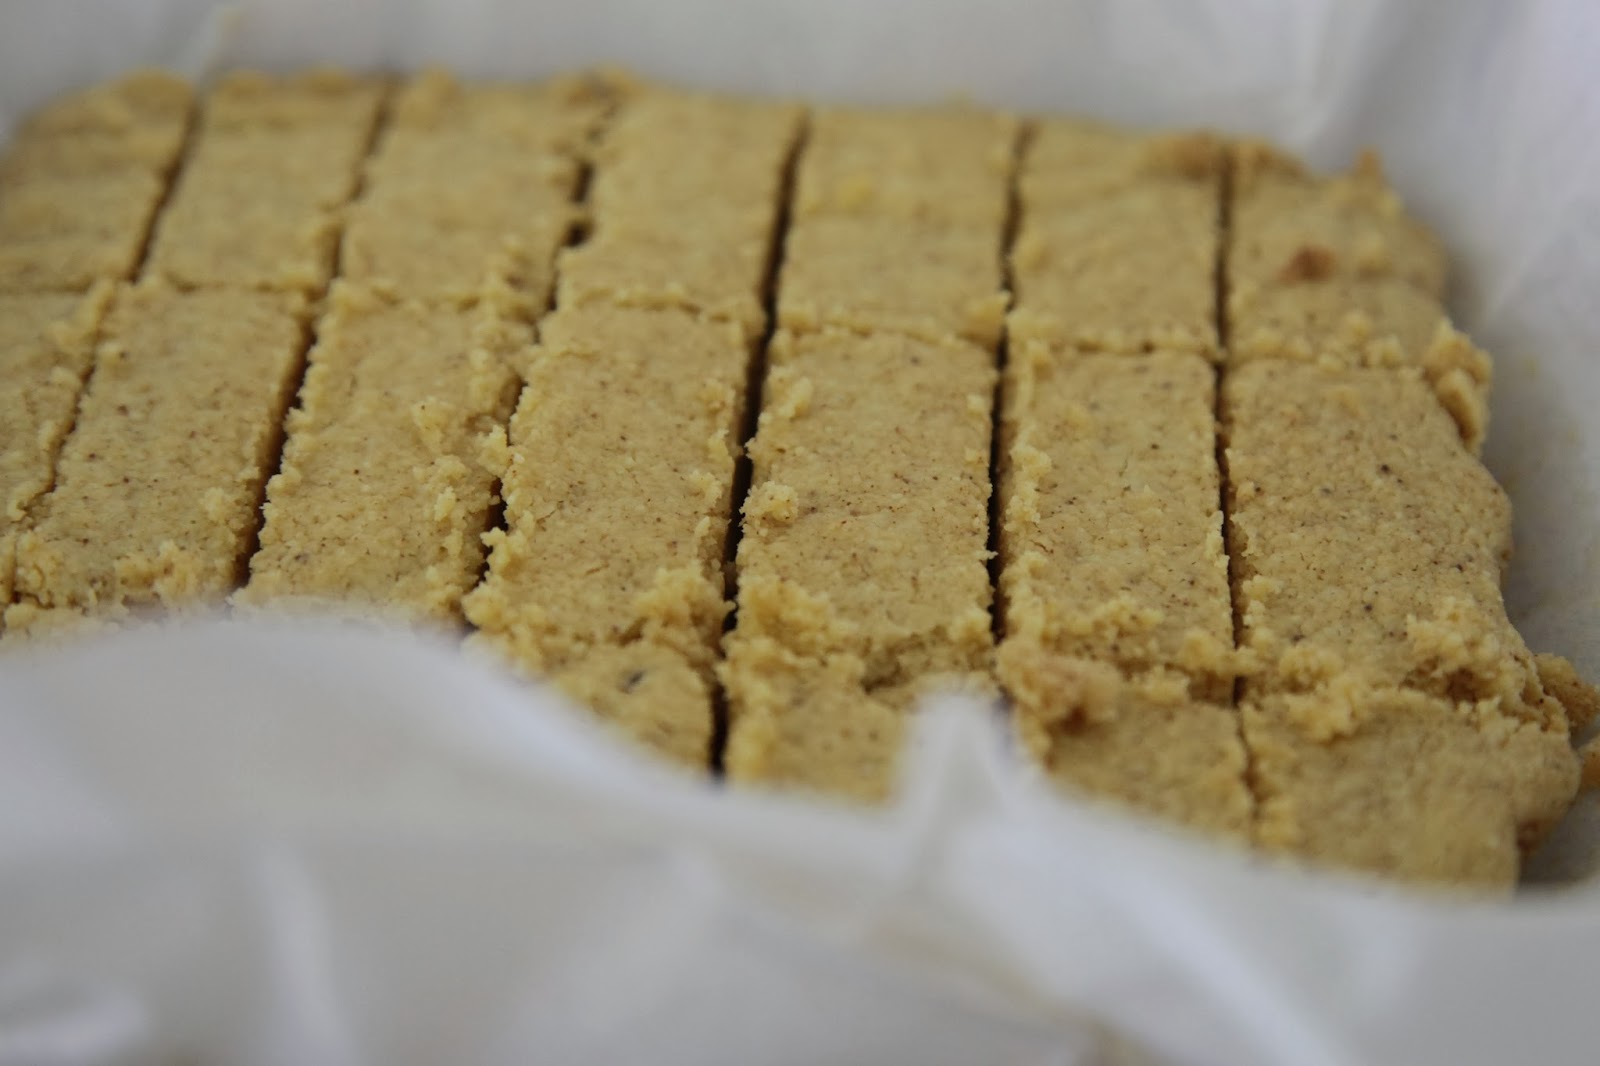
Brown Butter Shortbread


It's almost back to school for the kids in Australia! Unfortunately, that means less free time, baking and blogging, and more work, study and stress.. But hopefully I'll have time to squeeze in some blog posts for you guys. 
In the meantime, these brown butter shortbread were a new recipe I decided to experiment on a while ago. This time, my inspiration came from my huge butter and fatty food craving from a few months ago, so I came across these and my mouth instantly started drooling..
Like the other cookies I bake for my family and friends, these were very much enjoyed. I wasn't the only one who was experiencing the shortbread craving; and so these cookies naturally disappeared as quickly as they had come.

I've never actually heard of 'brown butter' before; nor have I ever cooked butter for so long. This technique is really effective though, as the butter flavour really comes out of the shortbread much more, and it smells much nuttier and toffee-like than your regular softened butter.

The brown butter bits also give the shortbread cookies those nice little dots! Also, as I mentioned before in the Espresso Coffee Shortbread post (click here for a link to that), I had never thought of cutting cookies after baking, but I've found it really helps give a much cleaner edge, especially if your dough has lots of baking powder or self-raising flour.

These cookies are the perfect pair for a nice steaming mug of coffee! They melt in your mouth a little and taste delicious. Usually, I'm not really a huge fan of butter or butter flavours, but these shortbread are totally different; they don't really have that rich, heavy texture that super buttery and fatty food usually come with. (Trying really hard not to drool right now..)

BROWN BUTTER SHORTBREAD

250g unsalted butter, cut into 1-tablespoon pieces
2 cups all-purpose flour
2/3 cup powdered sugar
2 tablespoons cornstarch
1/2 teaspoon fine salt
2 teaspoons pure vanilla extract
1/2 cup butterscotch chips, finely chopped

Line an 8 x 8-inch baking pan with parchment paper so it hangs over the sides (so you can easily lift the shortbread out later).
Heat the butter in a heavy-bottomed medium-sized skillet over medium heat. Whisk occasionally until the butter is melted, then once melted, continue whisking constantly. The butter will foam up and then subside; as it starts to boil, you will start to see brown bits form on the bottom. Once the butter is golden and smells nutty, pour it into a bowl to cool. (Be careful not to burn it; this whole process should take less than 5 minutes.) The darker milk solids will settle to the bottom; you can strain them out before using the butter if you like (it’s not necessary though, just personal preference).
Whisk together the flour, powdered sugar, cornstarch, and salt in a large bowl; mix in the vanilla with a fork.
Once the butter is cooled, drizzle it into the flour mixture a little at a time, mixing with a fork until all the butter is incorporated. (The dough will be quite dry and crumbly.)
Working somewhat quickly (because the dough stiffens a bit as it sits), and press the dough evenly into the prepared pan.
Preheat the oven to 150C, and while it heats, chill the dough for 30 minutes in the fridge.
Before baking, score the dough into whatever size and shape cookies you want; I like to make 20 long, thin cookies. (The scores will meld together a bit while baking, but should still be visible enough to help you cut the cookies after baking.)
Bake until the cookies are set, but not browned, about 35 minutes.
Cool for 5 minutes, then score the cookies again over the lines you already scored.
Cool 30 minutes in the pan, then use the parchment paper to lift the cookies out.
Cut the cookies along the scored lines, cool completely, and serve or store in an air-tight container at room temperature.
Read more
Friday, January 17, 2014
Pistachio Shortbread Mounds


Shortbread's always been a favourite in my family; the soft, crumbly texture and the slight melt-in-mouth feeling of each bite means that dozens of cookies are gone within the space of a week or so. Although my medical form states that I'm a tad allergic to pistachios, I've always been an avid fan of pistachios since forever. They're by far my favourite nut, with cashews next, but unfortunately, I am apparently most allergic to those two nuts..

I've been going through a phase where I'm completely sick of making White Chocolate Macadamia Cookies, because they're the classic favourite, so experimenting with different types of cookies and cakes has satisfied my baking needs recently. 

This cookie dough is really good eaten raw! I took a bite off the leftovers on the spoon and it was heaven..


I took a long time making sure my little shortbread mounds actually looked like mounds.. Trust me it's the hardest part, but the cookies turn out looking very unique and cute.

 
When shaping, try and shape them to be taller than you want them to be, because the butter in the dough will melt, and eventually the mounds will flatten and shrink a little bit in the oven.

 The before photo of the tall shortbread mounds.. and..

 ...The after shot of the cookies! They've definitely flattened during the baking process.. 

 Being the huge experimenting enthusiast that I am, I made two batches of these cookies at once, so don't be alarmed if you dont turn out with trays of cookies like this!


PISTACHIO SHORTBREAD MOUNDS
Makes 30

1 cup (110g) shelled pistachios, roasted
250g butter, softened
1 cup (160g) icing sugar
1 ½ cups (225g) plain flour
2 tbsp rice flour
2 tbsp cornflour
¾ cup (90g) almond meal
Preheat oven to 150C/130C fan forced. Line baking trays with baking paper.
Coarsely chop 2/3 of the nuts, and reserve the whole nuts for decoration.
Beat the butter and sifted icing sugar in a bowl with electric mixer until light and fluffy, about 2-3 minutes. Stir in sifted flour, almond meal and chopped nuts.
Shape level tablespoons of mixture into mounds, place about 3cm apart on oven trays. Note: Try and shape the dough into tall cones so that they will maintain a mound shape after the baking process. Press one whole nut on each mound, bake about 25 mins. Stand 5 mins, place on wire racks to cool.

Happy Holidays!
- Rachel

Read more
Friday, January 10, 2014
Sesame Zaru Soba Noodle Salad

My newest lunch love this year is a cold soba noodle salad! Commonly called zaru soba in Japanese, soba noodle salads are packed with amazing Asian oriental flavour, and are the perfect healthy and light option for the sizzling Aussie summer.


Mind you, although this recipe is for 4 people, I can safely say that I can conquer the whole bowl of noodles within a few hours. Just take a couple forkfuls of this stuff and I'll have finished the whole thing, but if you're not a particularly big eater, then feel free to leave some of this scrumptious glory to the early hours of the day. It's much easier to indulge in this salad because it can be eaten straight from the fridge; so you'll be lean and healthy in no time!


A generous amount of spring onions always does the trick.. I always tend to put way more than a recipe suggests, but the more the better, in my opinion.


Definitely looking as if I'm extremely proud of this lunch dish.. Perhaps the noodles were photographed in their last minutes of life before I gobbled them all up.


Food can be so beautiful sometimes.. Don't you agree?

SESAME ZARU SOBA NOODLE SALAD

100g black sesame seeds
a pinch of salt
270g packet of soba noodles
2 tsp rice wine vinegar
5 tsp soy sauce
2 tsp honey
2 tsp sesame oil
6 spring onions

Toast the sesame seeds in a dry pan over a high heat until they look golden brown, and tip them into a bowl.

Bring a large pan of water to the boil and add some salt. Put in the soba noodles and cook them for about 6 minutes (or according to packet instructions) until they are tender but not mushy. Have a bowl of iced water waiting to plunge them into after draining. Mix noodles with your hands to loosen up.

In the bowl you are going to serve them in, mix the vinegar, soy sauce, honey and oil. Then finely slice the spring onions and put them into the bowl with the cooled, drained noodles and mix together thoroughly before adding the sesame seeds and tossing again.

Leave the sesame seed noodles for about half an hour to let the flavours develop, although this is not absolutely necessary or sometimes even possible.

Additional information - for gluten free, check that the soba noodles are 100% buckwheat and use tamari instead of soy sauce.

Seriously the best noodles ever! Enjoy,
- Rachel

Read more
Monday, January 6, 2014
How to Open a Coconut The Right Way!

When I was over in Fiji not so long ago, I attended this really interesting Fijian cooking school called Flavours of Fiji, and as a huge fan of everything cooking, it was a great experience. Although the food turned out a little strange to my Australian tastebuds, it was amazing to see what local crops and goods the people of Fiji used for their everyday cooking.

Making Indian roti.. Tasted amazing!
What I discovered then was that coconut was a huge part of every single dish in Fiji; so naturally, the Fijians would have to crack open dozens of coconuts every week. If you've tried to open a coconut at home, you would understand how surprised I was as I watched our Fijian cook effortlessly split a coconut in less than 10 seconds. So as I write to you today, I hope you watch in disbelief at how easy it actually is to open a mature coconut!

So basically, nobody realises but every single coconut actually has three 'veins' running from the top three black spots.

This is the only good photo I could find that showed these veins. The lighter coloured lines seen on the coconuts are the veins, and you want to strike the middle of the coconut; perpendicular to these veins.
If you didn't understand my wild explanation of where to strike the coconut, here's a diagram!
You'll need something heavy and pointy-edged, such as a whetstone or large butchers' knife, but a hammer will do for those who don't have these utensils.
Hold the coconut firmly in your weaker hand, and strike the coconut as previously stated, on all three veins. Repeat until your coconut cracks along the equator of the coconut. Gently tap your whetstone around the crack and pry open your coconut. Voila! Cracking open a coconut isn't so hard, is it?
Scraping off the coconut meat has still posed as a huge difficulty for me though; does anyone have any good suggestions for getting the meat off, without having to stick it in the oven?
A YouTube video tutorial of this will be up soon, but I'm still putting it together! Feel free to check out my channel though, more videos will be coming soon!

Enjoy your holidays!
- Rachel
Read more
Wednesday, January 1, 2014
Espresso Coffee Shortbread


Merry Christmas and Happy New Year, my fellow bloggers! Alas, the happiest and most festive season of the year has finally come, and 2014 is here for us to carve our paths into. It marks a fresh start for all of us, and a fresh new batch of cookies! Here I've gone off creating some new little treats for Christmas and New Year, because as we all know, we must always try new things. My mother, being a huge coffee fanatic, absolutely devoured these! (Not really a good idea as shortbread is a fairly unhealthy little snack, but oh, its Christmas! Give her a break..)
 When I first used fresh coffee grounds in my baking, I was so reluctant. I never knew of any other ways coffee could be used for other than in the coffee machine, but nonetheless, I tried it out. The sweet but strong aroma of freshly brewed coffee is absolutely amazing when the cookies are in the oven, and I can safely say it really does smell like Christmas!

 I never knew about cutting cookies post-baking either; I always got so frustrated at my shortbread and cookie-cutter-shaped goodies when they finished their time in the oven because they'd be all flattened out and with any sign of a clean-cut edge gone! But thankfully, this little scoring trick has saved me from any more stressful cookie shape disasters, phew!

ESPRESSO COFFEE SHORTBREAD


1 1/2 cups (340g) butter, at room temperature
1 1/4 cups powdered sugar
1 teaspoon vanilla
1/2 teaspoon salt
4 teaspoons finely ground espresso-roast coffee beans
3 tablespoons Kahlúa or other coffee-flavored liqueur
3 1/3 cups all-purpose flour
1/2 cup almonds (optional)
Line an 8x8-inch baking pan with parchment paper so it hangs over the sides (so you can easily lift the shortbread out later).
Preheat oven to 160°. In a large bowl, use a mixer to beat together butter and sugar until light and fluffy. Add vanilla, salt, espresso grounds, and Kahlúa. Beat to combine. Add flour and mix until well blended. Press the dough evenly into the prepared pan and chill for 30 minutes in the fridge.
Before baking, score the dough into whatever size and shape cookies you want; I like to make 20 long, thin cookies. (The scores will meld together a bit while baking, but should still be visible enough to help you cut the cookies after baking.) Gently press one almond on top of each scored cookie.
Bake until the cookies are set, but not browned, about 35 minutes.
Cool for 5 minutes, then score the cookies again over the lines you already scored.
Cool 30 minutes in the pan, then use the parchment paper to lift the cookies out.
Cut the cookies along the scored lines, cool completely, and serve or store in an air-tight container at room temperature.


Nutrition Facts

Amount Per Serving
Calories 130Calories from Fat 70
% Daily Value *
Total Fat 8g12%
Saturated Fat 5g25%
Trans Fat
Cholesterol 20mg7%
Sodium 85mg4%
Potassium 20mg1%
Total Carbohydrate 13g4%
Dietary Fiber 0g0%
Sugars 5g
Protein 1g
Vitamin A6%
Vitamin C0%
Calcium0%
Iron4%
* Percent Daily Values are based on a 2,000 calorie diet. Your Daily Values may be higher or lower depending on your calorie needs.

Note: Nutritional analysis is per cookie.

Have fun and happy holidays!
-  Rachel

Read more
Sunday, December 22, 2013
Black Forest Cake

It's almost Christmas! Christmas is definitely my favourite time of the year, with all festivities of red and green decorating everything you can possibly think of. Last year, I created a cute Black Forest cake for our annual Christmas party, and it was super successful according to the many wonderful comments I received from the party guests.
2013 Christmas Black Forest cake! There's been a lot of change in this one compared to the 2012 version..
2012 Christmas Black Forest cake! The little wafers are a cute addition, aren't they? And the tempered chocolate is an old favourite.
So as requested by my family, I have recreated the Black Forest cake this year to celebrate Christmas with, and hopefully it will be loved by everyone as much as last year's version! I've played around with the designs on the cake, and decided to leave this cake a bit plainer than last years; instead of tempering little christmas trees, arty designs and 'Merry Christmas' for the cake top, I've simply just coated the top with cocoa and an edge of sweet cream!

Second layer of cream over the cherries..
Sandwiched all the layers of the cake with the cream oozing out the sides! Doesn't this make you crave some cake? It sure does for me..
Looks a bit like a tiramisu in this one! Perhaps that should be my next recipe.. What do you think?!
Ahh.. Cocoa!
Added the signature Black Forest cake cream lining! I've never seen a Black Forest cake without the piped rosettes..

The finished cake! Looks cute, don't you agree? I'm quite a fan of simplicity, and a simple, modern cake with slight traditional features is ideal!
I really love the contrasted tempered dark and white chocolate shards for the sides! I've used tempered chocolate shards for many of my cakes, but never have I blended white chocolate into my dark chocolate! It looks really good, but there are the downsides; the shards are much less sturdy and have a lower melting point, which was extremely hazardous for the boiling Christmas season here in Australia!

BLACK FOREST CAKE

  • 470g packet chocolate cake mix (I used White Wings Classics Moist Chocolate Cake box mix)
  • 670g jar of morello cherries
  • 2 tbs caster sugar
  • 1 tbs cornflour
  • 1/2 cup icing sugar
  • 600ml thickened cream
  • 200g good quality dark cooking chocolate
  • 100g good quality white cooking chocolate
  • 1/2 cup Dutch cocoa powder 

Prepare and bake the chocolate cake mix following packet directions. Turn onto a wire rack to cool completely. Use a large serrated knife to cut the cake horizontally into 3 even layers.

Drain the cherries, reserving 160ml (2/3 cup) of the juice. Place the cherries and the reserved juice in a saucepan with the sugar and cornflour. Stir over medium-low heat until the mixture boils and thickens. Transfer to a large bowl. Cover with plastic wrap and place in the fridge to chill.

Use an electric beater to beat cream and icing sugar in a medium bowl until firm peaks form.
Place 1 cake layer on a serving plate and spread with half of the cherry mixture and a thin layer of the cream. Repeat with the remaining cake, cherry mixture and cream, finishing with a layer of cake.
Spread some of the remaining cream over the top and side of the cake. Using a sieve, cover the top of the cake with Dutch cocoa powder. Place the remaining cream in a piping bag fitted with a 1cm fluted nozzle and carefully pipe rosettes around the edge of the cake. (Note: piping slowly will minimise the moving of rosettes on the cocoa powder).

Chop the chocolate into small pieces, and set aside 25% of both white and dark chocolates. Place the remaining chocolate in separate bowls and microwave on half power. Stir the mixture every half minute until it is almost completely melted (approximately 2-3 minutes).

Remove the bowls of chocolate from the microwave and stir to cool slightly. Add the reserved chocolate into their respective bowls and stir the chocolate until everything is melted. The dark chocolate should reach approximately 46C - 48C and white chocolate 36C - 43C.

Spread the tempered dark chocolate onto a large sheet of baking paper, shaping it until it reaches approximately 50cm x 10cm x 3mm. Leave to cool for 5 minutes, then spread the white chocolate on top. 
Using a butter knife, split the chocolate into even strips for easy removal when solid. Place the sheets of chocolate in the fridge to solidify. 

Remove the chocolate pieces from the baking paper and press onto the sides of the cake, making sure to alternate the heights of the pieces for a more contrasting effect. Cut and serve the cake.

- Rachel

<a href="http://www.bloglovin.com/blog/11454585/?claim=jup3zypdefz">Follow my blog with Bloglovin</a>
Read more
Wednesday, November 6, 2013
When You Have Nothing in the Fridge: Simple Vietnamese Rice Paper Rolls!

I've gotten a sudden spark of motivation to shape up again, so whilst I've been exercising my butt off, the ideas of healthy food came popping into my mind. Gourmet salads, wraps and sandwiches all made my mouth drool, but the only problem was.. I didn't have the ingredients to make any fancy healthy food in my pantry or fridge! I remembered that I had rice paper roll sheets hidden in a back cupboard somewhere, and luckily, these cute little inventions are easily modified while still maintaining its flavour! All you need is 5 ingredients, and you'll be full and satisfied for a long time!


 My dog really wanted some too.. look at her jealous expression!

This recipe is made according to what I had handy in my fridge, but pretty much any vegetable can be substituted into the recipe, so if you're a bit iffy about meat, then vegetables are completely fine!

VIETNAMESE RICE PAPER ROLLS

Vietnamese Rice Paper Rolls:
  • 10 rice paper roll sheets
  • 2 avocados, halved and sliced lengthwise
  • 1 cup fresh mint leaves
  • 400g beef stroganoff
  • 1 carrot, julienned
  • 400g bean sprouts
  • 300g rice vermicelli, cooked and drained
  • 10 prawns, cooked and peeled
Dipping Sauce:
  • 3 tbsp fish sauce
  • 3 tbsp sweet chilli sauce
  • 3 tbsp water
Cook beef stroganoff pieces in a large pan on medium heat until cooked. Transfer to a heatproof bowl.

Fill a large shallow bowl with water. Place rice paper sheet into water until soft, approximately 30-60 seconds. Lay sheet on a place or bench, and assemble roll with a small amount of mint, carrot, vermicelli, bean sprouts. Add 1 prawn, 1 slice of beef and 2 slices of avocado in a row across the top middle, leaving about 4cm of the sheet uncovered on each side.
Fold in two sides of wrapper to centre, and tightly roll to enclose the filling. Repeat with remaining rolls.

In a small bowl, combine fish sauce, sweet chilli sauce and water until combined. Serve rice paper rolls with dipping sauce.

- Rachel
Read more